

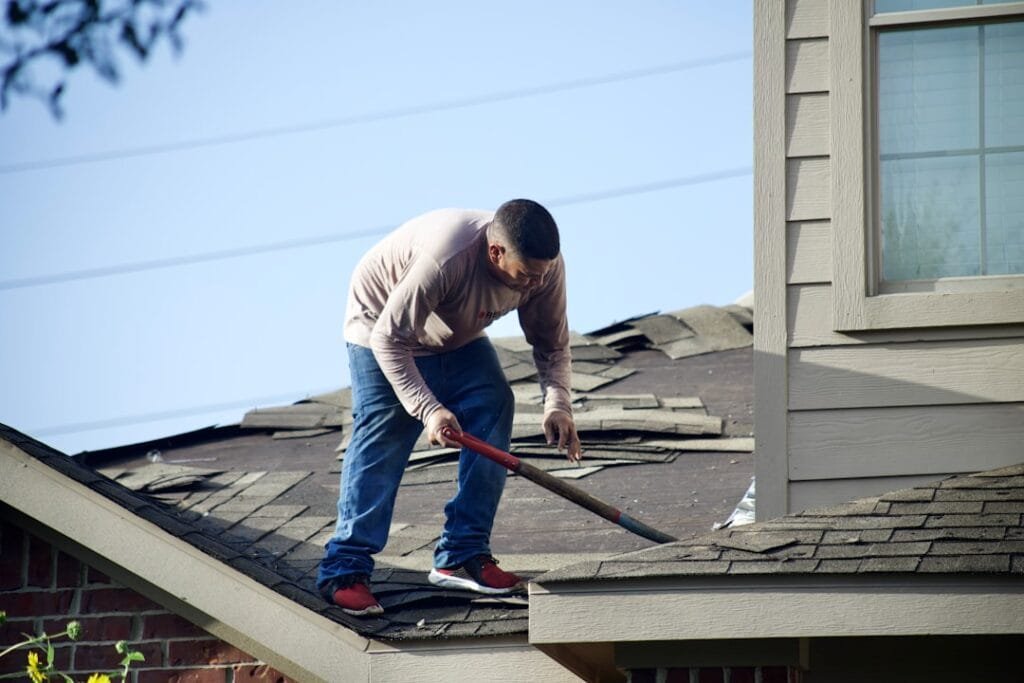
When Your Roof Takes a Hit: What You Need to Know About Asphalt Shingle Repair
Asphalt shingle repair is something most homeowners in Kearney, MO will face at least once — whether after a spring hailstorm, a windy fall night, or just years of wear. Here’s a fast-answer summary before we go deeper:
Quick Answer: Common asphalt shingle repairs you can DIY
| Damage Type | DIY Friendly? | What You Need |
|---|---|---|
| 1-5 missing shingles | Yes | Replacement shingles, roofing nails, pry bar |
| Cracked or split shingle | Yes | Roofing sealant, putty knife, granules |
| Curled shingle edges | Yes | Roofing cement, weight (brick), 24 hrs |
| Granule loss (minor) | Yes (temporary) | Roofing cement, loose granules |
| Failed flashing | Usually no | Professional recommended |
| Soft deck spots or rot | No | Professional required |
| Damage covering 25%+ of roof | No | Professional required |
Asphalt shingles are the most widely used steep-slope roofing material in North America — and one of their biggest advantages is that individual shingles can be repaired or replaced without tearing apart your entire roof. That makes targeted fixes practical and cost-effective, as long as the surrounding shingles are still in good shape and flexible enough to work with.
But not every damaged shingle is a simple weekend fix. Water travels sideways and uphill under shingles before it ever shows up as a stain on your ceiling. What looks like a single cracked shingle can sometimes signal a deeper problem with the underlayment or roof deck underneath.
This guide walks you through how to identify what you’re actually dealing with, what tools and materials you need, and how to make repairs that hold up — not just for the next rainstorm, but for years.
I’m Greg Nakata, owner of GNAK Roofing Services in Kearney, MO, and my background in commercial real estate lending and collateral underwriting since 1999 gives me a different lens on asphalt shingle repair — one focused on documentation, material compliance, and long-term asset protection. Whether you’re tackling a minor fix yourself or figuring out when to call a pro, the guidance below is built to help you make the right call.
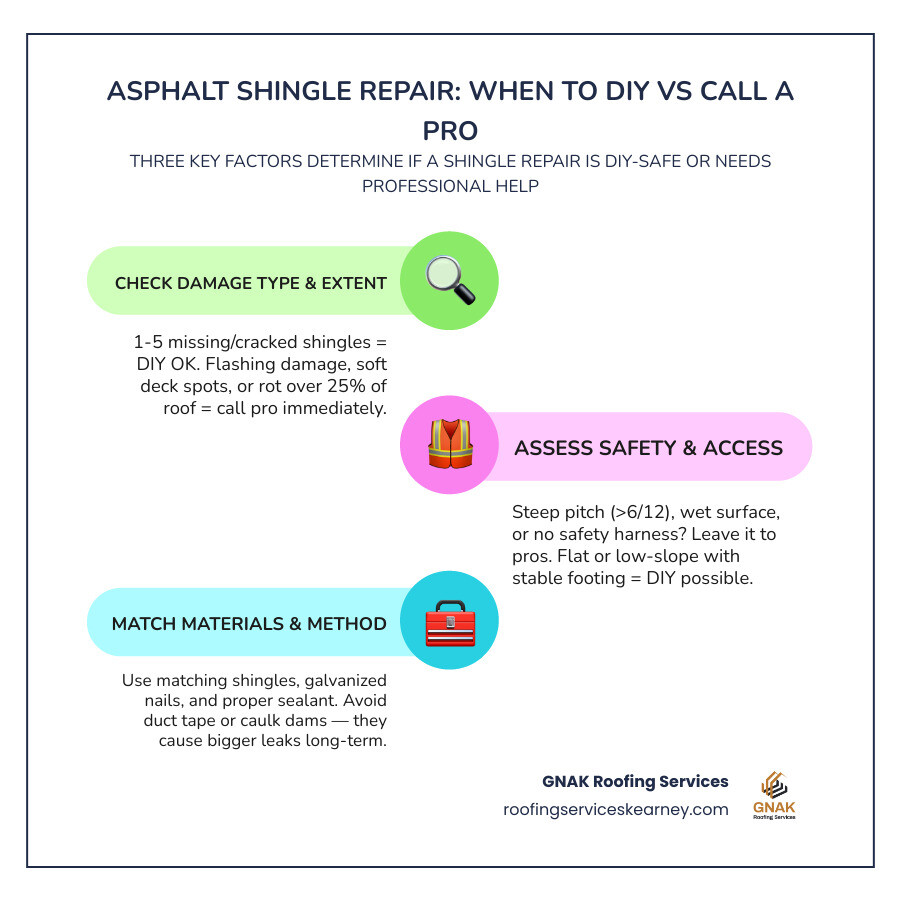
Asphalt shingle repair word list:
Common Types of Shingle Damage and DIY Limits
To successfully execute an asphalt shingle repair, we first have to understand the physical forces acting on our roofs. Missouri weather is notoriously tough on residential properties. From intense summer heat in Kansas City to freezing winter winds in St. Joseph, our roofs expand, contract, and take a beating year-round.
According to the TECHNICAL BULLETIN published by the Asphalt Roofing Manufacturers Association (ARMA), asphalt roofing systems are highly resilient because their individual components are physically independent. This modularity means we can unseal, repair, and reseal specific sections without compromising the surrounding structure. However, environmental wear manifests in several distinct ways:
- Granule Loss: The colored mineral granules on your shingles aren’t just there for curb appeal. They protect the underlying asphalt from ultraviolet (UV) radiation. Over time, physical impacts from hail or simple weathering wear these granules away. When you start finding piles of granules in your gutters or downspouts, the asphalt underneath is exposed to direct sunlight, accelerating its breakdown.
- Curling Shingles: Shingles can curl upward at the edges (clawing) or cup in the middle. This is often driven by high attic temperatures, poor ventilation, or the natural aging process of the organic or fiberglass mat.
- Wind Damage: Strong gusts can break the factory-applied self-sealing adhesive strips that hold shingle rows together. Once the bond is broken, the shingles flutter, crease, and can eventually tear off completely, leaving the underlayment exposed.
- Blistering: If moisture becomes trapped inside the shingle during manufacturing or due to extreme attic heat, it can expand and create small raised blisters. When these blisters pop, they shed their protective granules and leave the asphalt vulnerable.
- Water Stains: Water stains on your interior ceilings or attic rafters are the ultimate symptom of physical roof failure. However, water rarely drips straight down. It often enters through a crack or failed flashing uphill and travels laterally along the roof deck before finding a seam to drip through.
Identifying Minor vs. Major Damage
Before grabbing your ladder, we need to gauge the severity of the damage. Minor damage is localized, cosmetic, or limited to a handful of shingles. For instance, if a stray tree limb scrapes off a small patch of granules or cracks a single shingle tab, this is an excellent candidate for a localized Residential Roof Repair.
On the other hand, major damage involves structural compromise. If you notice widespread hail impact craters across multiple slopes, soft spots in the roof deck when you walk on it, or water actively pouring into your attic during a storm, you are dealing with systemic failure.
A great way to check for hidden structural damage is the “daylight test.” On a bright afternoon, climb into your attic, turn off all the lights, and look up. If you see pinpricks of sunlight shining through the roof boards, water is definitely finding its way through those same gaps.
The Limits of DIY Asphalt Shingle Repair
While a simple patch is highly achievable for a handy homeowner, safety must always come first. Working on a roof carries inherent physical risks. According to industry safety data, falls from roofs are among the leading causes of residential DIY injuries.
If your home has a steep roof pitch — generally anything greater than a 4:12 slope (meaning the roof rises 4 inches for every 12 inches of horizontal run) — you should never step onto it without a professional roof safety harness and a securely anchored ridge hook. If you do not own this specialized safety gear, or if you feel uncomfortable navigating heights, do not risk it.
Additionally, attempting a complex DIY repair without understanding manufacturer-compliant methods can void your shingles’ warranty. For a deeper look at balancing safety and craftsmanship, consult A Practical Guide to Reliable Roof Repair.
When to Choose Professional Asphalt Shingle Repair
There is a major difference between patching a visible tear and tracking down an elusive, active leak. Water is sneaky. It can enter near a chimney flashing, run six feet down a rafter, and pool above your living room ceiling.
Professional roofers utilize advanced diagnostic tools to solve these mysteries. At GNAK Roofing Services, we employ thermal imaging cameras and moisture meters to map out water paths behind drywall and underlayment without tearing your home apart.
Furthermore, professional repairs ensure your manufacturer warranties remain fully intact. If you are dealing with complex flashing details, valley intersections, or multiple leak points, booking a professional assessment through Roof Inspection Services is the safest and most cost-effective path forward.
Signs Your Roof Needs Full Replacement
Every roof has an expiration date. While the average architectural shingle has a design lifespan of around 25 to 30 years (and 3-tab shingles typically last 15 to 20 years), environmental wear eventually catches up.
If your roof is approaching its 25th year and you notice widespread curling, buckling, or bald shingles across more than 25% of the total surface area, localized repairs are no longer economically viable. Trying to repair a brittle, aging roof is like trying to sew wet paper — the adjacent shingles will simply crack and split as you try to work with them.
Furthermore, if we discover extensive rot or sagging in the plywood roof deck, a complete tear-off is required to rebuild a safe structural foundation. To understand the transition from targeted repairs to full restoration, read The Complete Guide to Storm Damage Roof Repair.
Essential Tools and Materials for Asphalt Shingle Repair
If you have evaluated the damage and decided to move forward with a localized DIY fix, having the right gear is non-negotiable.
Using the wrong adhesive or forcing shingles with improper tools will only create larger leaks down the road. For a comprehensive breakdown of materials, you can read the Essential Tools and Materials for Asphalt Shingle Repair.
Must-Have Tools for the Job
To perform a clean, long-lasting repair, assemble the following tools before climbing the ladder:
- Roofing Hammer: A standard claw hammer works, but a specialized roofing hammer with a built-in gauge helps ensure proper shingle exposure.
- Flat Pry Bar (Shingle Pry Bar): This is your most important tool. You will use it to gently break the adhesive seals between shingles and lift old nails without tearing the surrounding tabs.
- Utility Knife: Equip this with a sharp hook blade, which makes cutting through tough asphalt shingles incredibly clean and easy.
- Safety Glasses and Heavy-Duty Gloves: Asphalt shingles are highly abrasive, and old roofing nails can easily splinter or fly when pried loose.
- Sturdy Extension Ladder: Always set your ladder on flat, stable ground, extending it at least three feet above the roof edge, and tie it off if possible.
Choosing the Right Sealants and Adhesives
Never grab a random tube of household silicone caulk for a roof repair. Silicone does not adhere well to asphalt and will quickly peel away under intense UV exposure. Instead, choose products specifically engineered for roofing environments:
- Plastic Roof Cement: This is a thick, asphalt-based adhesive applied with a trowel. It is excellent for securing loose tabs, patching small punctures, and sealing flashing edges. However, standard plastic roof cement must be applied to dry surfaces.
- Rubberized Wet Patch: This is a premium elastomeric sealant formulated with synthetic rubbers. It is designed to adhere to wet surfaces, making it your absolute best friend for emergency repairs during active rainstorms.
- Butyl Rubber or Polyurethane Sealant: These come in standard 10.1 oz caulk tubes and are ideal for sealing hairline cracks, nail heads, and thin seams. They retain their flexibility through extreme freeze-thaw cycles.
Pro-tip: Any roofing cement or sealant left exposed to the sun will degrade and crack within one to two seasons due to UV radiation. Always press loose mineral granules (which you can scoop right out of your gutters) directly into the wet sealant to protect it from the sun.
Step-by-Step Guide to Replacing and Patching Shingles
Now that your tools are ready and the weather is cooperative — ideally a dry, mild day between 45°F and 75°F when shingles are flexible but not so hot that they melt or stick to your shoes — it is time to perform the physical repair.

For a complete visual breakdown of these physical mechanics, refer to the Step-by-Step Asphalt Shingle Repair.
Replacing a Missing Shingle Step-by-Step
Replacing a completely missing or severely torn shingle is a modular process. Because shingles overlap, you cannot simply nail a new one over the gap. You must integrate it into the existing pattern.
- Locate and Unseal the Damaged Area: Slide your flat pry bar under the shingle tab directly above the missing or damaged shingle. Gently slide it left and right to break the factory adhesive seal. Repeat this for the row above that one as well, as shingles are double-layered.
- Remove the Old Nails: Shingles are held down by nails driven through the nail strip, which also pierce the top of the shingle below them. Carefully slide your flat bar under the overlapping shingles, position it around the nail shank, and pry upward. Remove all four to six nails holding the damaged shingle in place, as well as the nails in the shingle directly above it that pierce the damaged piece.
- Slide Out the Damaged Shingle: Once all nails are removed, the damaged shingle should slide out easily. If it catches, check for a missed nail. Never leave old nail stubs sticking up; they will eventually push upward and puncture your new shingle from below.
- Position the New Shingle: Slide your matching replacement shingle into the gap, aligning its bottom edge perfectly with the existing shingle row.
- Nail It Down Correctly: Drive exactly four galvanized roofing nails (at least 1.25 inches long) directly through the designated nail line on the new shingle. Do not nail too high or too low.
- Seal the Overlapping Tabs: Apply a small, dime-sized dab of plastic roof cement under each of the newly lifted tabs above the repair, then press them down firmly. This manual hand-sealing ensures the wind cannot catch the edges before the sun has a chance to warm and activate the factory adhesive strip.
Fixing Curled, Cracked, or Torn Shingles
If a shingle is simply cracked, torn, or curling but still securely attached, you do not always need to replace the entire piece. You can execute a highly durable patch using the steps outlined in the Best Practices for Patching Cracked Shingles.
To fix a curled shingle, sweep away any dirt or debris from underneath the tab. Apply a generous bead of polyurethane roofing sealant to the underside of the curl, press it flat against the shingle below, and place a brick or flat board on top for 24 hours to let the adhesive cure.
To repair a cracked or split shingle, gently lift the tab and apply a bead of sealant directly beneath the crack to form a waterproof barrier on the underlayment. Lower the tab, apply a thin layer of sealant over the top of the crack, and smooth it flat with a putty knife. Finally, sprinkle a handful of loose gutter granules over the wet sealant, pressing them in gently. This not only protects the patch from UV rays but makes the repair practically invisible from the ground.
How to Match Replacement Shingles
A mismatched shingle patch stands out like a sore thumb and can raise red flags during a home inspection. The absolute best way to match your shingles is to use spare pieces saved in your garage or attic from the original installation.
If you do not have spares, try to identify the manufacturer and color name of your existing roof. If you are unsure, carefully cut a small sample from a damaged shingle and take it to a local roofing distributor in the Kansas City or Liberty area to find a matching product.
That even if you find the exact same brand and color, your existing roof has faded due to weathering and sun exposure. The new shingle will initially look slightly darker, but this aesthetic difference will naturally blend in over a few months of exposure to the elements.
Common Mistakes to Avoid During DIY Repairs
When tackling a DIY roof fix, watch out for these common installation pitfalls:
- High-Nailing: Driving nails above the manufacturer’s designated nail line is a major mistake. It misses the double-layer reinforcement zone, leaving your shingles highly susceptible to blowing off in high winds.
- Leaving Nails Exposed: Every nail head must be covered by the overlapping shingle above it. If you must leave a nail exposed (such as on a ridge cap), cover the nail head with a dab of high-quality roofing sealant.
- Using Duct Tape or Cheap Caulk: Duct tape will freeze, curl, and channel water directly into your roof structure. Silicone caulk will quickly peel away. Stick to approved asphalt-based cements and polyurethane sealants.
- Creating Caulk Dams: Applying thick, globby barriers of caulk around a leak can trap pooling water behind them, forcing the water to back up under the shingles and find a new way into your home.
Frequently Asked Questions about Shingle Maintenance
Proactive maintenance is the key to extending your roof’s lifespan and avoiding costly water damage. For a complete set of maintenance guidelines, check out the Shingle Roofing Maintenance Standards.
Can I repair an asphalt shingle roof in the winter?
Yes, but it requires extra care. Asphalt shingles become brittle in cold temperatures and can easily crack when you try to lift them. Additionally, self-sealing adhesive strips and roofing cements require warm temperatures (typically above 40°F, and ideally 45°F to 75°F) to activate and bond properly.
If you must make a winter repair in St. Joseph or Clay County, use a heat gun on a low setting for 30 seconds to carefully soften the shingles before bending them, and manually hand-seal every tab with a cold-weather-rated adhesive.
How long does a typical shingle patch last?
A professionally executed patch on a roof that is otherwise in good structural condition can easily last 5 to 10 years, matching the remaining lifespan of the surrounding shingles. However, if the roof is old and brittle, a patch is merely a temporary band-aid designed to buy you a few months to plan for a full replacement.
What is the difference between roof cement and roof sealant?
Roof cement (such as plastic roof cement) is a thick, heavy-bodied asphalt paste applied with a trowel or putty knife, making it perfect for filling large gaps, patching punctures, and securing loose shingle edges. Roof sealant (such as butyl or polyurethane) is a thinner, highly flexible liquid applied with a caulk gun, designed to seal tight seams, hairline cracks, and exposed nail heads.
Conclusion
Taking care of your roof doesn’t have to be an overwhelming chore. By tackling minor repairs early — like securing a loose tab or patching a cracked shingle — you can prevent water from reaching your roof deck, protect your home’s structural integrity, and maximize the lifespan of your roof.
However, climbing onto a roof carries real risks, and some leaks require advanced diagnostics to solve correctly. If you’re dealing with extensive storm damage, steep slopes, or hard-to-find leaks, we are here to help. At GNAK Roofing Services, we combine our deep local knowledge of Clay County and the surrounding Kansas City metro with insurance-ready documentation and manufacturer-compliant workmanship to make sure your home stays safe and dry.
If you would like a professional, no-obligation inspection of your roof’s condition, contact us today or visit our Roof Repair Independence MO page to schedule a service call. Let’s make sure your roof is ready for whatever the Missouri weather throws at it next!